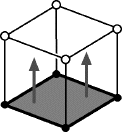
Frink: -- but suppose we exte-end the square beyond the two dimensions of our universe (along the hypothetical z-axis, there).
Everyone: [gasps]
Frink: This forms a three-dimensional object known as a "cube", or a "Frinkahedron" in honor of its discoverer, n'hey, n'hey.
(Taken from text transcript of 3D Homer segment and Did You Notice? by James A. Cherry)
On the "Frinkahedron", label the z-axis
| Before we try to glue a cube, let's do an easier example together. We can form a cylinder by taking a piece of paper and gluing 2 opposite sides together (try this). We could explain this to 2D Marge by drawing a square and then telling her the left and right side are glued. |

|
From Davide Cervone's Folding Cubes and Hypercubes:
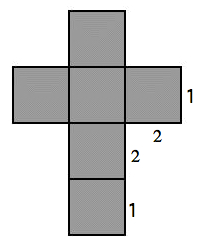
"The following movie shows an unfolded cube (red) in space, together with its shadow (pink) on the plane below. The white dot at the top of the image represents the light source. As the red cube folds up, we can follow the results in the shadow below. As the sides of the cube begin to fold up, the shadows of these squares become distorted (one edge is closer to the light than the opposite edge, so one edge has a larger shadow than the other).... We rotate the whole arrangement so that we see only the shadow of the cube and must imagine the three-dimensional cube unfolding that causes these shadows." After you click on the link on today's lab, use the
 Play Button to watch
Davide Cervone's
Folding Cube Movie.
|
Torus - A Euclidean Universe A torus is a mathematician's name for a donut. The surface of a torus is the topological space found in old-style video games such as Pac Man, where a spaceship goes off the right-hand side of the screen only to reappear on the left, or off the top to reappear on the bottom.

| If you take a sheet and try to glue the left edge to the right edge (the single arrows tell you to do this) and the top edge to the bottom edge (the double arrows tell you to do this), the paper will crumple up and you'll get a big mess. |
| But, we can do this identification of a square with a stretchy piece of rubber. First we identify the left and right hand side in order to form a cylinder. We use these arrows and the points that correspond to glue the top and the bottom together and this forms a donut or torus. | 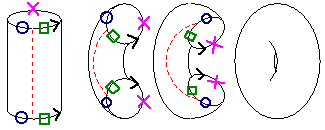 |
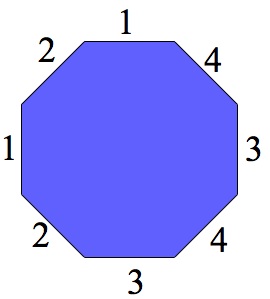
| Here we glue the side with a number on it with the side that has the same number on it. It is an exercise in visualization skills to see that the resulting figure is a 2-holed donut. Here are directions for sewing the 2-holed donut that may be helpful for visual purposes. | 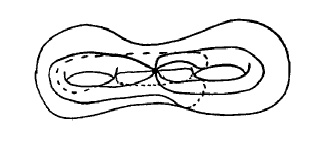 |
To understand why the laws of Euclidean geometry that you learned in high school do not apply to the 2-holed donut, we can look to see whether octagons will tile the plane in the same way that Escher created his works of art. So we would like to know whether we can take a certain number of octagons (instead of angles and devils like Escher used in the distorted hyperbolic Heaven and Hell work...) and put them together around a vertex in order to form 360 degrees.
 ___________
If so, we could create a flat tiling work of art (like Escher) without distorting them. If not, then we must distort them in order to create a flat work of art.
We can create a 2-holed donut by using a distorted octagon with 45 degree interior angles. Eight of these glue together in a space that looks like Escher's work to form 360 degrees at a vertex and so they tile the space. Now we understand some of the issues that Escher faced and why his Heaven and Hell work looked like it did.

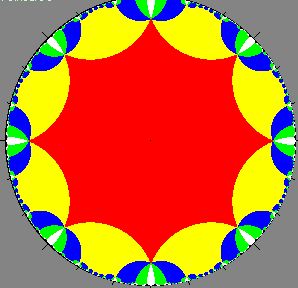
 |
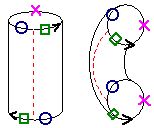
Notice that this identification labeling of a square looks similar to the one that resulted in a torus (donut), but the top and bottom edges are glued with a twist - a reflection in the line between the midpoints of the sides. Just as a 2D Flatlander could not imagine how to construct a cylinder out of a piece of paper, we have problems figuring out how to put together this square, because when we label corresponding points (such as the green squares, which are the same in this space because they are identified via the reflection in the dotted line), there seems to be no way to glue them together. However, an inhabitant of 4-space would have no trouble because he would have enough space to glue the edges together. |
|
Forming the Klein bottle slinky.
There is only one way to for us to put this space together in 3D-
by having a slinky intersect itself by passing through itself.
I have a glass Klein bottle in my office.
I'll come around to show you this gluing.

Klein bottle |
| Tiling View: Life Inside the Klein Bottle Both the Klein bottle and torus satisfy the laws of Euclidean geometry from high school because we can tile the plane with a square without distortion- four 90 degree angles come together at a vertex to form 360 degrees. If we sketch what a creature living on the Klein bottle would see in all directions, this is called a tiling view. The top left is really just below the bottom right in this Klein Bottle universe because they are identified by the mirror reflection. However, if we look off to the right or left, we see exactly the same image instead of the reflected one. | 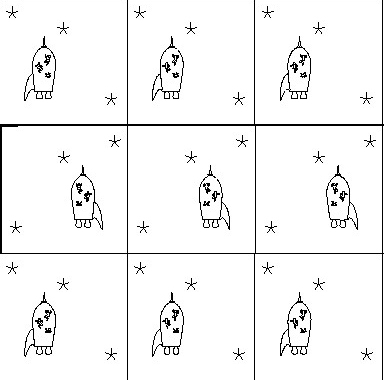 |
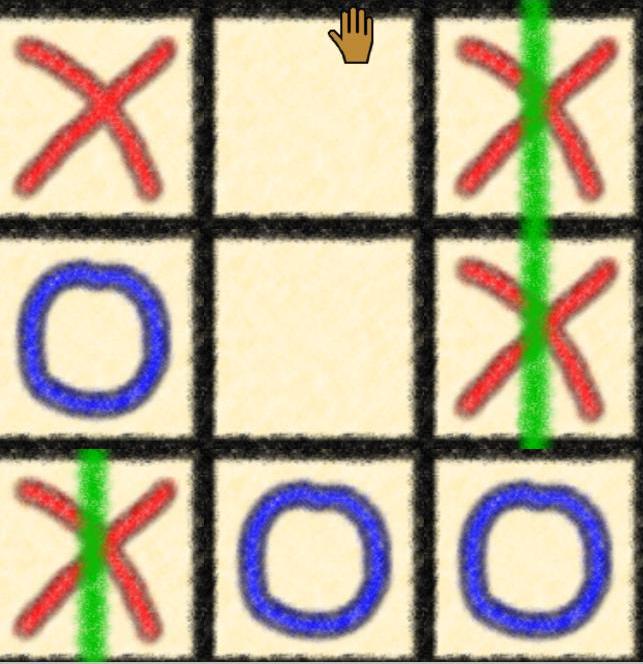 |
Experience what it is like to live on a Klein Bottle by playing
Klein Bottle Tic-Tac-Toe.
* Choose a partner and have one person read these instructions while the other follows them. *Download Torus Games for Mac OS 10.12 or later. You can also download this free software onto other devices from the above link, if you prefer. * Select Tic-Tac-Toe. * Using the Options menu, change to Human vs. Human. * Using the Topology menu, change to Klein Bottle. * You are allowed to scroll the board by clicking on a grid line, holding down and moving. Move the hand that results to the right and see like it behaves like a Pac-Man. Move up to the top and see the reflection about the vertical purple dashed line. The esc key will let you access the menus or rest of your computer again. * The Rules: When the purple dotted line of reflection is in the middle, then the top left square is just below (out of view) the bottom right square in this Klein Bottle universe. The yellow dotted lines show the straight across identifications left to right, as you can see when you scroll horizontally. *Erase Tic-Tac-Toe Board will bring up a new game. |
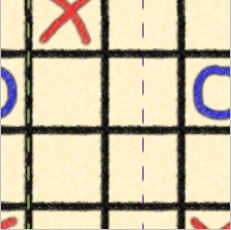
A partially scrolled game showing the identifications
Play on one computer with a partner:
Next scroll the board so that the purple dotted line of reflection is in the middle of the board. Then play without scrolling the board. It may help if you sketch a tiling view on a piece of paper as you make your moves, where left and right is the same as the board, but above and below are reflected (with the left and right columns swapped), like with the spaceship picture above.
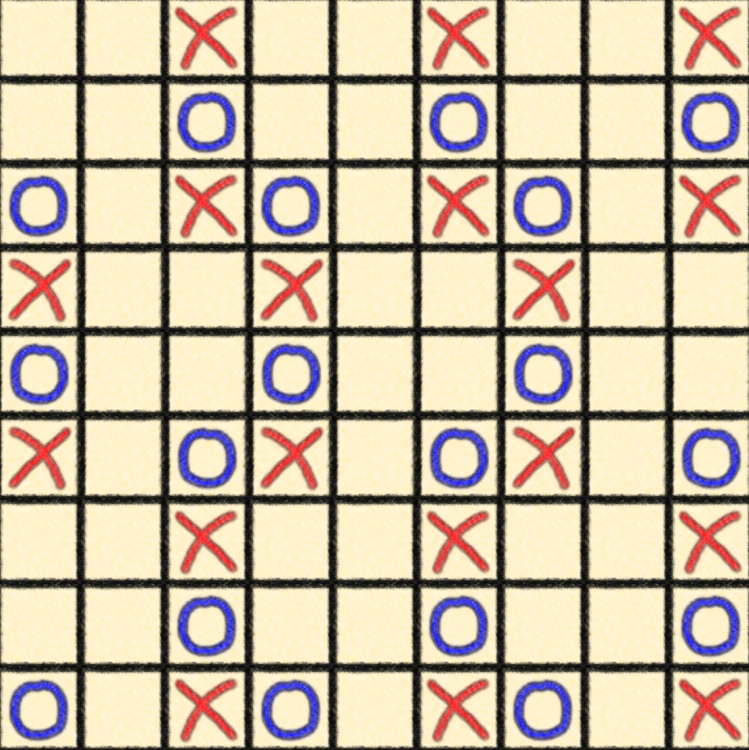 |
Play enough times of this, or another one of the games, that you understand the visualization of the Klein bottle tiling (reflected above and below, same image to the left and right - like the spaceships). The Klein bottle Pool Balls or the Maze are especially nice visualizations.